
I want to be able to use this space a little better for tutorials and editing tips. So, every once in a while I’d like to post a mid-challenge tutorial. Mostly, I want them to be editing related, however, at times they could be geared more towards improving behind the camera skills.
So, I’m looking for some experienced editors to guest post!
These tutorials will lean more towards improving the quality of work for
someone looking to start a photography business, improving the photos they post
or their blog, or creating art for your walls.
If you are interested in guest posting, please submit your
ideas here.
To start things off, I couldn't resist playing with the beautiful
photo for this week. So, I’m going to take you through the progression of my
edit. When we have portraits, I see many of you writing that you aren't too
comfortable with them, so I’m hoping this helps!
This edit can be done with almost any editing program
(photoshop, lightroom, elements, or picmonkey – possibly more but these are the
ones I’ve used).
Here’s where we are starting:

Original photo by Rebecca Curtis Photography
Edit 1: A Clean Edit
- Correcting the exposure:
- Increase Brightness
- Increase Contrast (slightly)
- Adjusting the Temperature:
- Increase warmth (slightly)
- Cloning:
- Using the clone tool I removed the panda (it just seemed a little distracting to me – I edit like I’m going to hang this in a large frame on my living room wall). Sometimes I use the blur tool after cloning to make sure there are no hard lines.
- Eyes:
- Select the dodge tool – make it small enough to fit between the pupil the outer right of the iris, opacity at about 20% or so. Now brush over the irises and the whites of the eye. Make sure you get toward the inside corner of the eye if they need brightening a little.
- Select the Burn tool – make your brush as small as the pupil, brush it over the eye lashes, around the iris and dot the pupil. I also used it on her eye brows and around her face to add definition.
- Make it larger and brush under the chin and in the hairline (you may need to decrease the opacity a little more for this.
- Skin correction:
- Select blur tool set to about 12% and brush on skin, being careful to not lose any definition by going over the lines of the face.
- Select your brush tool, use the eye dropper to select the color from her lips, at a very low opacity brush the color on her cheeks. This just gives her a little more life! In lightroom you would selct your adjustment brush and in picmonkey you'd do this using the "blush" tool.
- Sharpen
- Save your work!
Here is a cleanly edited photo:

We could end here. It's a beautiful photo, but I'd like to take it a few steps further to add personal style.
Edit 2: Fall Fun
The photo has a really wintery feel with the dark jacket and the cool hues. So, here's a simple way to bring out the fall and warm it up a little more! Here we will use layering or a preset.
Photoshop & Elements:
- Create a new layer
- Using the paint bucket fill it with a light pink, again you can draw from the photo - her cheeks would work here.
- Now change your layer to hard light and decrease the opacity until you get an effect you like.
- Save your work!

A slight change that makes a huge difference!
Edit 3: A Matte Look
There are a few different ways to get a matte look to your photos in photoshop, but using a curves adjustment is one that can be done with almost any editing program. Here's a picmonkey tutorial.
- Select Curves
- Anchor your light, mid and dark tones by clicking where the diagonal line crosses each t in the grid.
- At the very bottom left corner pull up on your line until you start seeing the photo change.
- Create and unsharp mask and make sure your features still pop, but don't look too harsh!
- Save your work!

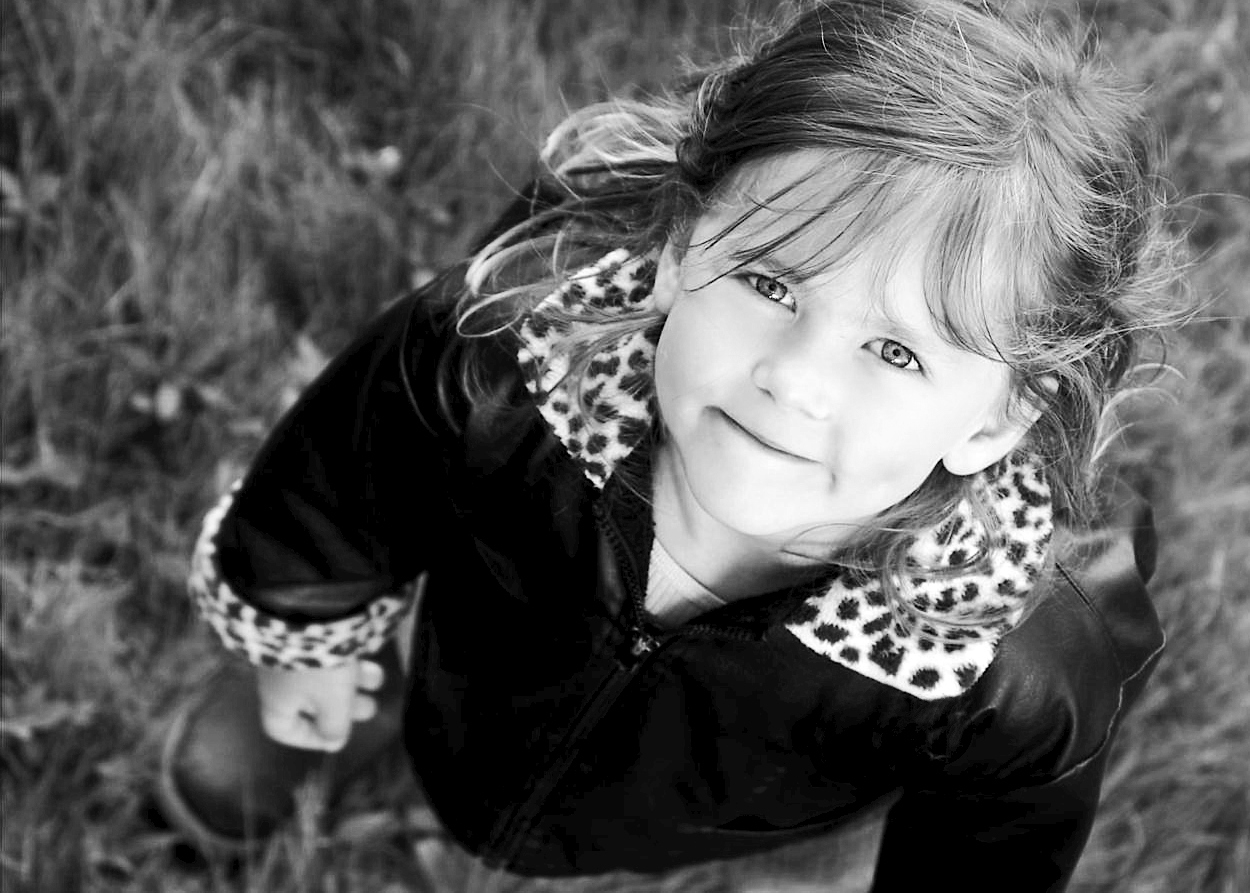
Edit 4: B&W
- Go back to your Clean or your Fall edit.
TIP: The black and white effect in any program almost never works. I do my black and whites mostly using the gradient map, but this way will work well on most photos also.
- Saturation
- pull it all the way to the left
- Contrast
- bump it up just slightly
- I also decided to crop for this edit to bring the more contrasting elements into the center of focus.
- Save your work!
Edit 5: Matte B&W
Same steps as Edit 3 with a little more haze added.
- Select Curves
- Anchor your light, mid and dark tones by clicking where the diagonal line crosses each t in the grid.
- At the very bottom left corner pull up on your line until you start seeing the photo change.
- Create and unsharp mask and make sure your features still pop, but don't look too harsh!
- Save your work!
I also added a texture to this photo - but we'll save that for another tutorial.

There you go! Here's the progression side by side.

This comment has been removed by the author.
ReplyDeleteI love the clean edit and I'm definitely going to try this on pics of my kids! Thanks for sharing the tips :)
ReplyDeleteThis was great, Stephanie! It's helpful to read the how-to process, with the photo edit comparisons; I'd love to have more of these. Thanks for taking your time to do this.
ReplyDeleteThis was a great tutorial. =)
ReplyDeleteLooks awesome! thanks for your steps.
ReplyDeletefabulous edits!
ReplyDeletethankyou, thankyou, thankyou!!! I have been trying to figure out how to do matte editing for a while now. And to think it was soooo simple. =)
ReplyDelete