May 14, 2013

Softening Skin in Photoshop

Skin Softening + Brightness + Contrast + Sharpening Adjustments

Softening or Smoothing Skin in Photoshop

In my opinion (being a natural light photographer) photographing clients outdoors is ideal. However, in full natural light all of our skin's uniqueness tends shows up!  To the naked eye the subject is moving and little details aren't as noticable, but once captured, frozen in time, every little detail starts to show. 

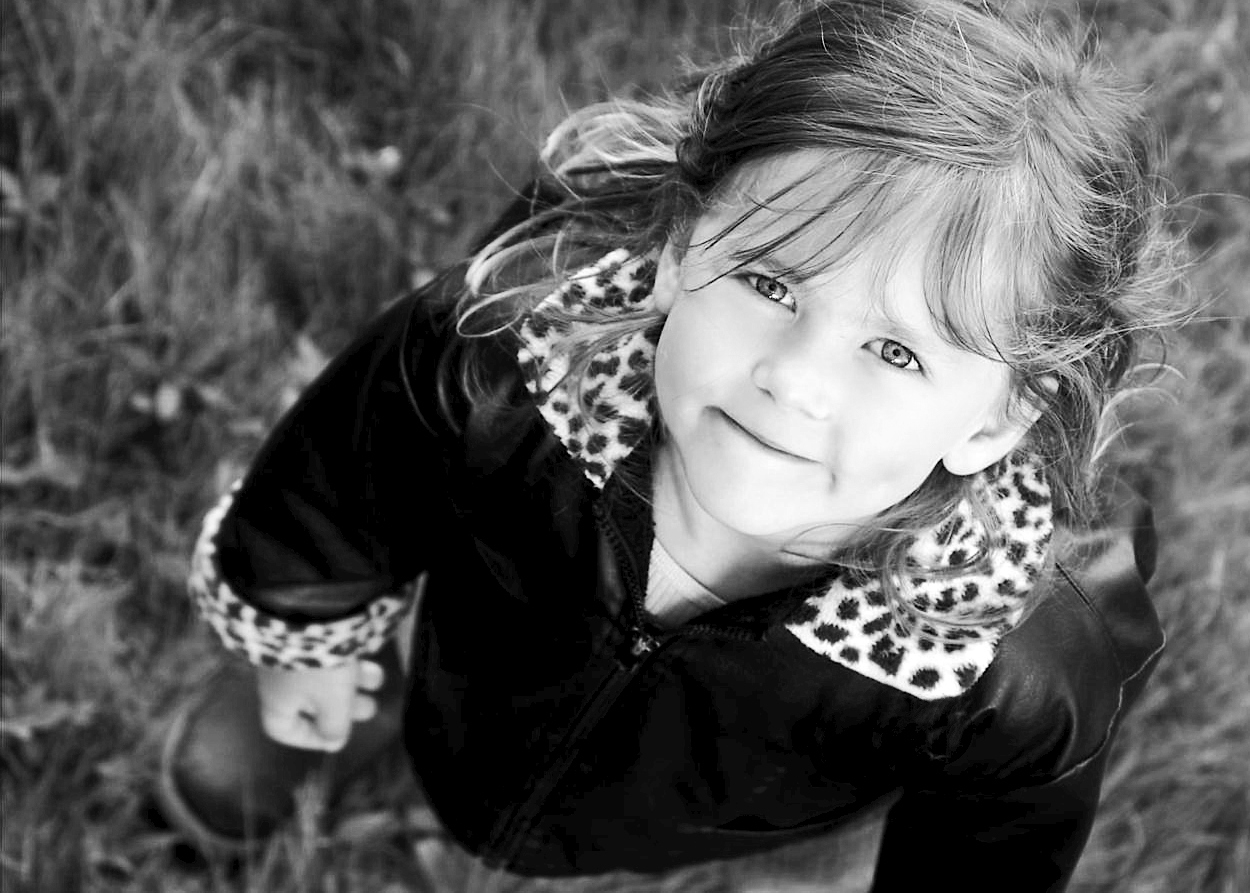
As a photographer, I like the details but I don't want those details to keep us from seeing the beauty of the moment! So, even on the softest littlest of skin, I like to do a little smoothing. 

My favorite way to accomplish this in Photoshop is using a CoffeeShop Action. They are free (please donate to the site) and easy to use! I can use the same basic concepts and create this look myself, but Rita does it brilliantly. For this tutorial I used Powder Room 3. 

My steps:
(1) Run Power Room 3 in photoshop
(2) Use white soft brush at 100% to soften skin
(3) Adjust opacity of layer to likeness
(4) Pick Eye Define Layer and not only define eyes but go over the lines in and around the face to give them a little more definition. 


Sometimes I use the whitening layers and brightening if needed. 

When I'm done I merge the layers and continue adjustments. 


The difference is subtle but needed!

Don't forget to link up!


Show us what you would do with this photo!

There are some exciting things and more guest posting photographer/bloggers coming up soon. I can't wait! 


RESOURCES:


May 7, 2013

MAY CHALLENGE!

Welcome back for the May Challenge! I'm hoping to get a few more of you guys editing and linking up this month so be sure to share on Facebook, Twitter, and your blogs!

I started photographing this little girl's little brother in January and get to spend a year (hopefully longer) watching them grow. During his sessions we try to squeeze in a few with big sister and she just steals the show! If you'd like to see a few more of their previews, you can see them by liking Gray Mornings Photography on Facebook.

Click to download larger version. 


Here are the details:
  1. When you link up, please use your edited photo as the thumbnail! (NOTE: We will not have photo thumbnails this month)
  2. Link directly to your blog post or flickr photo for the challenge. All other links will be deleted. 
  3. Don't forget so share your editing steps, or some tips and tricks so we can learn from each other!
  4. Don't forget to use the #editmechallenge hashtag when you share your posts on Twitter. 
  5. The linky will open at the time of the post on Tuesday, May 7th and end May 31st. 
  6. Don't forget to visit the other participants, and leave some comment love! As usual, the more you participate the more feedback you will get!
  7. One (or more) of you will be featured during the last week of the challenge! 
I can't wait to see what you do! 

If you would like to submit an editing tutorial, please email editmechallenge@gmail.com. 

April 26, 2013

April Feature!

Getting going again has been a little tough over here at Edit Me, but lets keep it going! I'm hoping many of you will still link up before the end of the month! You still have time.

While I'm recruiting guest posters, we may not see many tutorials mid-month unless I have the time to write them myself. Fortunately, Anne from Hot Coffee Mama explained her steps for us to add a sunflare in Adobe Elements so I will be featuring her edit and tutorial with you guys today! 


Here's what Anne did: Opened in Photoshop Elements and cloned out minor imperfections and distractions. Adjusted levels, added soft light layer 30%, new layer gold 15% screen. Used coffee shop's sun flare action and adjusted to my liking. Adjusted brightness and contrast, did a slight burning around the edges to make the girl pop more, reduced noise slightly and sharpened for web and there you go, more or less. 
Head over to Hot Coffee Mama and I'm sure Anne would be glad to answer any questions you have!


A tutorial on how to add sunflare in elements manually can be found here.


Thanks for participating in the Edit Me Challenge! 
A new Challenge starts May 7th! 


April 2, 2013

Edit Me is back! April Challenge

Hello long lost Edit Me friends! Anyone still out there? I sure hope so.

I've given this blog and challenge much thought over the last few months. I have even sought advice from friends in the blogging community about just what to do with this space. Finally, I have reached a decision because I terribly miss this learning forum that was once pretty great here, I am officially bringing The Edit Me Challenge back! 

I will probably be tweaking the site a little over the next month or two. For now, it will be just me, Stephanie, with hopefully some guest editors, teachers, and advisers. I hope to make this a place where new photographers can come to learn from those with experience and connect with those who are also just starting out. 

There will be some changes, so here's what you can expect: 

  • Monthly Photo Challenges - On the first Tuesday each month there will be a new challenge posted. The photos you will see will come from photographers/bloggers who already have a pretty good grasp on how to use their camera. This challenge will be about growing your skills in editing. The purpose will be to take a well composed  photo (with room for improvement) and making it the best it can be so the client cannot resist. There will be a link up open throughout the month to submit your edit. 
  • Editing Tutorials - In the weeks in between challenges there will be posts from experienced photographers (hopefully some who've been here and grown) showing you their own tips and tricks to make that finished product their customer cannot refuse!
  • Feedback & Features - On the fourth Tuesday of the month some of you will be featured in a feedback and features post. To be featured, you must have linked up to the challenge and share some tips and tricks about how you edited the photo! I will ask other photographers to anonymously critique the chosen edits and possible offer some tips on how to make it even better OR maybe just an easier way to get the same effect.
  • Sponsorship - For now, we won't have any prizes or winners, I will be working on a new featured button for you to grab. Also, Edit Me will be accepting sponsorship and ad swapping beginning in May. I am looking for sponsors to be photo blogs and shops looking to get more exposure, shops that sell actions, textures and templates for photographers, or businesses that provide services and or products for photographers.  

Now, here's what you have all been waiting for... this months photo. This is from a recent portrait session with a very busy little girl. This photo has the potential to be so much more than it already is. I can't wait to see how you guys rise to the challenge! 


click to download photo


Here are the details:
  1. When you link up, please use your edited photo as the thumbnail! (NOTE: We will not have photo thumbnails this month)
  2. Link directly to your blog post or flickr photo for the challenge. All other links will be deleted. 
  3. Don't forget so share your editing steps, or some tips and tricks so we can learn from each other!
  4. Don't forget to use the #editmechallenge hashtag when you share your posts on Twitter. 
  5. The linky will open at the time of the post on Tuesday, April 2nd and end April 30th. 
  6. Don't forget to visit the other participants, and leave some comment love! As usual, the more you participate the more feedback you will get!


December 10, 2012

Many Apologies

Hi guys! I'm so sorry I let so much time go by without picking a winner or even updating. Edit Me has just become the last thing on the thousand mile long list! I actually just got back to my personal blog for the first time since Thanksgiving! With such a busy holiday schedule, a sick baby, and a sick mommy (me) over the past two weeks, I just haven't had the chance to do anything but the necessary.
We are all fine! Thank you for the comment and email Amy. So very sorry I didn't get back to you sooner!
After my one year old put my iPhone in a cup of coffee about a month ago, I haven't reloaded the Edit Me gmail back to my phone, but I will and I would love to hear all of your thoughts! I know we've already scaled down, but I just don't see how I can feasably continue this challenge every week. I really enjoy this format and would love some feedback from all of you! I want to keep challenges going, but I just don't have time to seek out guest judges, sift through photos, etc every week.

I'm thinking possibly a monthly challenge, but I'm open to suggestions. Something that I would LOVE to do is feature some of our participants/friends by way of guest posts. If you would like to be a featured guest please submit your ideas via email.

For now, we are going to take a holiday break! I really hope you guys enjoy the holidays and get to spend time with your families. I'd love to keep up with you guys in the meantime so please visit my blog, personal facebook, twitter, or instagram @stephaniesclark (it's the best!).

For those of you wondering about Branson, her mom, etc. You can head over to her blog. She updates once or twice a week or follow her on instagram @bransonlee. Please continue to pray as her mom goes through chemo.

Finally, I'm not going to pick winners for the last challenge. With only 7 participants, I think you guys are all winners. Thank you for joining in!

If you didn't get a change check each edit out for yourself:

 I hope to hear from all of you soon! Get those guest post in!

xStephanie

November 13, 2012

Edit Me Challenge 11.14.12

Hi guys! I'm super excited about this week. First, I'm no longer sick and neither is my child *knock on wood* and can focus a little on something else. woo hoo! Secondly, I'm judging this week and I have something a little different and special.

I'm giving you guys two photos and two weeks to edit them! Since we are celebrating Thanksgiving next week, I'm going to give you guys until Saturday, November 24th at Midnight to link up! So, if you are too busy this week with preparations then when you're stuffed and bored come by and edit away. You can only link one photo for judging, please specify in your post or comments (flickr) which photo you are entering. You CAN use both photos. A collage for example will be judged as one photo. HAVE FUN!

If you are new here: 

I'm Stephanie. I run this little editing challenge, but my regular blog is Behind the Camera and Dreaming. You can find me bloggingtweetingfacebookingpinning, and instagraming (stephaniesclark). There's a little more about me here


Click on photo to download full file. 

Click on photo to download full file. 

Here are the details:
  1. When you link up, please use your edited photo as the thumbnail!
  2. If you use the mouseover code or right-click protect your images, you need to either add a copy to the flickr pool(preferred) or it will be assumed that you agree to allow us to use a screenshot of your entry if you are a winner!
  3. The judge for the week will choose the top 3 edits from the entries, and the overall winner of the 3.
  4. If you would like to post multiple edits, specify which one is your choice for judging. Only one photo is eligible for judging, and it must be clear which one you are entering.
  5. Don't forget so share your editing steps, or some tips and tricks so we can learn from each other!
  6. Don't forget to use the #editmechallenge hashtag when you share your posts on Twitter. 
  7. The linky will open at the time of the post on Wednesday, and close the following Saturday at 11:59 PM (central time).
  8. Winners will be announced the following Tuesday.
  9. Don't forget to visit the other participants, and leave some comment love! As usual, the more you participate the more feedback you will get!


Winners!

Thanks SO much to our wonderful judge this week! Make sure you stop by her blog and tell her thanks!
Here's what Marilyn had to say about this week's edits and her top 3!


It was hard to narrow the amazing links down to simply three! Everyone's
edit was soo beautiful and unique in its own sweet way.. Here are the ones 
I couldn't help but look over again and again.. Congratulations....
**~*Third Place ~ Smriti*~** 
I absolutely love the feel of the edited photo. The clouds POP, and the 
subtle hdr effect is simply wonderful.. Great tones and a 
beautiful edit overall.. Perfect touch to the photo Smriti.. !!

**~*Second Place ~Media*~** 
I love her versatile her edit is, totally out the box and unique!
I'd totally wear this shirt anyday.. ;)) A great way to savor a 
memory to last a lifetime.. Great editing Media..
**~*First Place ~ & Winner Is 
*The Amazing Amanda*~** 
This was a beautiful fun day, warm, relaxing and so much of nature
to take in happily.. You brought all of that OUT in your edit and made
me smile. Beautiful light, lovely tones and filled with LIFE! 
Congratulations on an amazingly awesome edit.. LOVE this.. 


NEW CHALLENGE STARTS TOMORROW!
Photobucket

November 7, 2012

Edit Me Challenge 11.7.12

Hi guys! Thanks for coming back this week! We have a beautiful photo to edit and a wonderful judge:

 I'm Marilyn, Liberia Born, Craft Addict: Lover, Giver Of Life {my two beautiful Moon heads} Witty and fun..~Penny Traveler--Pixel Junkie/ M&M addicted - I heart causes..Simply just a lil bit in love with my far from perfect world.It's such  an honor to have you stop in. Hope you take an inspiration or two away, and share your time here within my lovely space creatively inspired.


Click to download for editing.

This challenge is all about taking a photo and making it your own with the editing program of your choice! It is also about learning a little bit from each other, and exploring new styles! There are no restrictions (unless specifically stated within the post for the week), but we do ask that you share a little bit about how you arrived at your finished product. 

Here are the details:
  1. When you link up, please use your edited photo as the thumbnail!
  2. If you use the mouseover code or right-click protect your images, you need to either add a copy to the flickr pool(preferred) or it will be assumed that you agree to allow us to use a screenshot of your entry if you are a winner!
  3. The judge for the week will choose the top 3 edits from the entries, and the overall winner of the 3.
  4. If you would like to post multiple edits, specify which one is your choice for judging. Only one photo is eligible for judging, and it must be clear which one you are entering.
  5. Don't forget so share your editing steps, or some tips and tricks so we can learn from each other!
  6. Don't forget to use the #editmechallenge hashtag when you share your posts on Twitter. 
  7. The linky will open at the time of the post on Wednesday, and close the following Saturday at 11:59 PM (central time).
  8. Winners will be announced the following Tuesday.
  9. Don't forget to visit the other participants, and leave some comment love! As usual, the more you participate the more feedback you will get!

October 31, 2012

Have a Happy Halloween!

Sorry guys! There will be no challenge this week. It was a last minute decision! Please take a minute to check out Branson's blog post today if you haven't already and pray for her, her mom, and family. 

Hope you have a great week! See you next week.


Trick or Treat from me and the little man!

xo
Stephanie


October 30, 2012

Winners!

Thanks for another great week Edit Mers! Hope you'll join us again for the next challenge! Our judge this week was Amy, head over and visit Little Adventures and check out her work here

 Here's a little more about her:


Little Adventures
Hey everyone. My name is Amy. I am married to my best friend and we have one son who just turned four, Wyatt. We are in our second year of homeschooling. I never knew how amazing that would be and how it would be such a growth experience for my son and I. Photography has been a love of mines for a few years now, but since the birth of my son in 2008, it truly became a passion. I love taking photos, scrap-booking, reading, a good movie, spending time with old friends and making new ones via my blog. 


You guys made it near impossible to choose winners this week. WOW. I am beyond stunned by the creativity and the talent that you ladies possess. Thank You to all of you for taking the time out of your lives to edit my lighthouse photo, and a big thank you again for the Edit Me Challenge letting me Guest Judge this week. 


Without further ado, my winners:


Cindy @ Everyday to Us
I thought this was an amazing edit. The addition of the lake behind it truly gave it a different perspective. Great Cloning and lovely editing!
Great Job!


Kaylene @Le'Instant
What you did with the sky was phenomenal! I cannot even say enough great things about this edit. The coloring, the added reflection in the water, It just is perfect.


For the overall winner,
I choose...


Marilyn @TheArtsyGirl
I am in awe. This photo reminded me of something I would see in an old Bahamian history book of Hope Town, Abaco. This is our candy stripe lighthouse. This just brought back so many memories of looking through old albums that my grandparents have. Well Done Marilyn. The addition of the dinghy was perfect.
Congrats!


Thank You again! What beautiful edits.

Don't forget to grab your buttons!
New Challenge starts tomorrow!

October 23, 2012

Edit Me Challenge 10.24.12

 Hi guys! Thanks for stopping by. If you're new here check out our guidelines and see just how everything works around here. 

I'd like to take a moment to make a small request to make this challenge a little more efficient

I totally get making your photos unright-clickable (that's a word I totally checked. no. no I didn't) however, it takes just that much more time to do a winners post. Most of you blog and know already how long it takes to create a carefully thought out, edited post, with the photos just the right size, etc. So, if you disable the right click function on your blog, please send me a copy of your photo that you've entered for the challenge each week to our edit me email. If I don't have a copy via email and you are chosen as a Top 3 winner, you will only see a link to your blog post or flickr account in the winners post, without showing off your actual photo. 

Now, onto the new challenge! This week we have Amy as our guest judge. Are you excited as I am. This lady looooves editing. (so do I!) Without further ado... 

Little Adventures
Hey everyone. My name is Amy. I am married to my best friend and we have one son who just turned four, Wyatt. We are in our second year of homeschooling. I never knew how amazing that would be and how it would be such a growth experience for my son and I. Photography has been a love of mines for a few years now, but since the birth of my son in 2008, it truly became a passion. I love taking photos, scrap-booking, reading, a good movie, spending time with old friends and making new ones via my blog. 
Welcome Amy, head over and visit Little Adventures and check out her work here

Here's the photo she has for us today! Be creative friends!

click photo for download


Here are the details:
  1. When you link up, please use your edited photo as the thumbnail!
  2. If you use the mouseover code or right-click protect your images, you need to either add a copy to the flickr pool(preferred) or it will be assumed that you agree to allow us to use a screenshot of your entry if you are a winner!
  3. The judge for the week will choose the top 3 edits from the entries, and the overall winner of the 3.
  4. If you would like to post multiple edits, specify which one is your choice for judging. Only one photo is eligible for judging, and it must be clear which one you are entering.
  5. Don't forget so share your editing steps, or some tips and tricks so we can learn from each other!
  6. Don't forget to use the #editmechallenge hashtag when you share your posts on Twitter. 
  7. The linky will open at the time of the post on Wednesday, and close the following Saturday at 11:59 PM (central time).
  8. Winners will be announced the following Tuesday.
  9. Don't forget to visit the other participants, and leave some comment love! As usual, the more you participate the more feedback you will get!


October 22, 2012

Winners!


Thank you to Julie for being a wonderful judge this week! Here's a little more about her:
I am a stay at home mama with 4 children.  I started photo editing on a limited basis after my first child was born.  I worked on scrap booking projects and similar things for a few years.  When my Mom died in 2008, I started pursuing this hobby more seriously.  It became a sort of outlet for me.  I have continued to learn and grow, since then, in both photography and editing. 

Julie doesn't currently have a blog, we'd love to see a blog from her though! She always does such a great job here on the challenge! You can check out her work here.


Here are her choices and what she had to say!


 It was absolutely brutal choosing a winner!  


Larissa @ Mathew and Larissa

I loved the richness of colour in her edit and overall I thought it was just really beautiful.  


 I thought her edit was a wonderful clean edit.  It was simple but so lovely and she really proved that sometimes, less is more! 


For the overall winner, I chose  Seeing Beauty by Amanda.  

Her edit was so vibrant and the frame she chose suited her edit perfectly.  I just loved it and thought it was extremely well done!  

 I'd like to thank everyone who took the time to edit my photo, they were all fantastic and it was super hard to only choose 3!


Thanks for another great week!
A new challenge starts tomorrow!

October 16, 2012

Edit Me 10.17.12

This week we have a great photographer and edit me regular! Last week's winner, Julie! Follow along with this week's challenge on Twitter and Facebook!

Here's a little about our judge:


I am a stay at home mama with 4 children.  I started photo editing on a limited basis after my first child was born.  I worked on scrap booking projects and similar things for a few years.  When my Mom died in 2008, I started pursuing this hobby more seriously.  It became a sort of outlet for me.  I have continued to learn and grow, since then, in both photography and editing. 

Julie doesn't currently have a blog, we'd love to see a blog from her though! She always does such a great job here on the challenge! You can check out her work here.


Here's the photo she has for you:


Click Photo for Download


Here's how it all works:
  1. When you link up, please use your edited photo as the thumbnail!
  2. If you use the mouseover code or right-click protect your images, you need to either add a copy to the flickr pool(preferred) or it will be assumed that you agree to allow us to use a screenshot of your entry if you are a winner!
  3. The judge for the week will choose the top 3 edits from the entries, and the overall winner of the 3.
  4. If you would like to post multiple edits, specify which one is your choice for judging. Only one photo is eligible for judging, and it must be clear which one you are entering.
  5. Don't forget so share your editing steps, or some tips and tricks so we can learn from each other!
  6. Don't forget to use the #editmechallenge hashtag when you share your posts on Twitter. 
  7. The linky will open at the time of the post on Wednesday, and close the following Saturday at 11:59 PM (central time).
  8. Winners will be announced the following Tuesday.
  9. Don't forget to visit the other participants, and leave some comment love! As usual, the more you participate the more feedback you will get!

October 15, 2012

Winners


Thank you everyone who entered an edit of this BEAUTIFUL photo! I hope you saw my portrait tutorial and will tell me what you think! Connect with the group via twitter and facebook!

In case you missed it here's a little about our judge!

Hi! I’m so excited to be a judge for the Edit Me Challenge this week!  I’m a part time photographer and full time wife (to Mike) and mom to our 4 wonderful kids.  Most of my time is spent home schooling our children.  I think my love of photography was born from a desire to capture all the little details and moments in our children’s lives - the little fingers, toes, the silly toothless grins.  I love to watch people – to see their expressions, capture their emotions.  My own style of editing is very clean.  I like to draw out the colors, sharpness and richness of the life around us.  The great thing about photography is how personalized it is.  You could have 5 photographers taking pictures of the same thing and get COMPLETELY different interpretations – it is truly art.  Thank you so much for taking the time to edit my photo.  I’m looking forward to your interpretation!


Be sure to visit one of these sites and tell her Thanks! 

Wow!  You have no idea how difficult it was to choose my top 3 edits!
  
8073234329_65f029b987_b
I love this edit!  It’s sharp, clean and the eyes really grab you!
Next up....
Capture
I like the texturing on this edit and the warm colors.  Nice job Smile


My #1 Edit is....
by Julie H 
8075018183_efc66cab87_c
I love the old film look of this edit and the crop.  It’s the photo I keep going back to – LOVELY!

and wait there's more...
I don't normally include the honorable mentions or any other than the top 3 but I'd figured I'd make an exception this time and include... a Model's Choice Award ;)

by Amanda at Seeing Beauty:  She liked the paper frame and how blue her eyes are (I must admit – I agree with her!)

Thank you to all of you who took the time to edit my photo.  You did such a great job!

Congrats to our Winners!
Don't forget a new challenge starts tomorrow!
Grab your winner's buttons!

October 11, 2012

Progressive Portrait Tutorial

Hi guys!

I want to be able to use this space a little better for tutorials and editing tips. So, every once in a while I’d like to post a mid-challenge tutorial. Mostly, I want them to be editing related, however, at times they could be geared more towards improving behind the camera skills.


So, I’m looking for some experienced editors to guest post! These tutorials will lean more towards improving the quality of work for someone looking to start a photography business, improving the photos they post or their blog, or creating art for your walls.

If you are interested in guest posting, please submit your ideas here.

To start things off, I couldn't resist playing with the beautiful photo for this week. So, I’m going to take you through the progression of my edit. When we have portraits, I see many of you writing that you aren't too comfortable with them, so I’m hoping this helps!

This edit can be done with almost any editing program (photoshop, lightroom, elements, or picmonkey – possibly more but these are the ones I’ve used).

Here’s where we are starting:

Original photo by Rebecca Curtis Photography
Edit 1: A Clean Edit
  • Correcting the exposure:
    • Increase Brightness
    • Increase Contrast (slightly)
  • Adjusting the Temperature:
    • Increase warmth (slightly)
  • Cloning:
    • Using the clone tool I removed the panda (it just seemed a little distracting to me – I edit like I’m going to hang this in a large frame on my living room wall). Sometimes I use the blur tool after cloning to make sure there are no hard lines.
  • Eyes:
    • Select the dodge tool – make it small enough to fit between the pupil the outer right of the iris, opacity at about 20% or so. Now brush over the irises and the whites of the eye. Make sure you get toward the inside corner of the eye if they need brightening a little.
    • Select the Burn tool – make your brush as small as the pupil, brush it over the eye lashes, around the iris and dot the pupil. I also used it on her eye brows and around her face to add definition.
    • Make it larger and brush under the chin and in the hairline (you may need to decrease the opacity a little more for this.
  • Skin correction:
    • Select blur tool set to about 12% and brush on skin, being careful to not lose any definition by going over the lines of the face.
    • Select your brush tool, use the eye dropper to select the color from her lips, at a very low opacity brush the color on her cheeks. This just gives her a little more life! In lightroom you would selct your adjustment brush and in picmonkey you'd do this using the "blush" tool. 
  • Sharpen
  • Save your work! 

Here is a cleanly edited photo:

We could end here. It's a beautiful photo, but I'd like to take it a few steps further to add personal style. 

Edit 2: Fall Fun

The photo has a really wintery feel with the dark jacket and the cool hues. So, here's a simple way to bring out the fall and warm it up a little more! Here we will use layering or a preset. 
Photoshop & Elements:
  • Create a new layer
    • Using the paint bucket fill it with a light pink, again you can draw from the photo - her cheeks would work here. 
    • Now change your layer to hard light and decrease the opacity until you get an effect you like. 
  • Save your work!
A slight change that makes a huge difference!
Edit 3: A Matte Look 

There are a few different ways to get a matte look to your photos in photoshop, but using a curves adjustment is one that can be done with almost any editing program. Here's a picmonkey tutorial. 
  • Select Curves
    • Anchor your light, mid and dark tones by clicking where the diagonal line crosses each t in the grid. 
    • At the very bottom left corner pull up on your line until you start seeing the photo change. 
    • Create and unsharp mask and make sure your features still pop, but don't look too harsh!
  • Save your work!

Edit 4: B&W
  • Go back to your Clean or your Fall edit. 
TIP: The black and white effect in any program almost never works. I do my black and whites mostly using the gradient map, but this way will work well on most photos also. 
  • Saturation
    • pull it all the way to the left
  • Contrast
    • bump it up just slightly
  • I also decided to crop for this edit to bring the more contrasting elements into the center of focus. 
  • Save your work!

Edit 5: Matte B&W

Same steps as Edit 3 with a little more haze added. 
  • Select Curves
    • Anchor your light, mid and dark tones by clicking where the diagonal line crosses each t in the grid. 
    • At the very bottom left corner pull up on your line until you start seeing the photo change. 
    • Create and unsharp mask and make sure your features still pop, but don't look too harsh!
  • Save your work!
I also added a texture to this photo - but we'll save that for another tutorial. 


There you go! Here's the progression side by side. 


I would LOVE some feedback on this idea and on this specific tutorial! Also, feel free to Pin It! Thanks friends!
xo Stephanie